Details for Beauty and Livability
On the material plane, much happiness comes from pleasant surroundings in which it’s easy to get things done. Thus, it’s hard to separate aesthetics from functional design. I thought about both of these in working with my architect, Henry Dearborn, my builder, Vernon Little, and my other design consultants.
Having set the basic framework for floorplan, electrical and plumbing in the construction drawings, I devoted much thought and energy to perfecting the other aspects of my home’s design. Those who know me would appreciate that I was particularly obsessed with the details of my kitchen. By strange coincidence and good fortune, Vernon connected me with Amy Norris. I soon discovered that Amy had designed Marlene’s kitchen in North Raleigh a few years before.
A Chef’s Kitchen Design Process
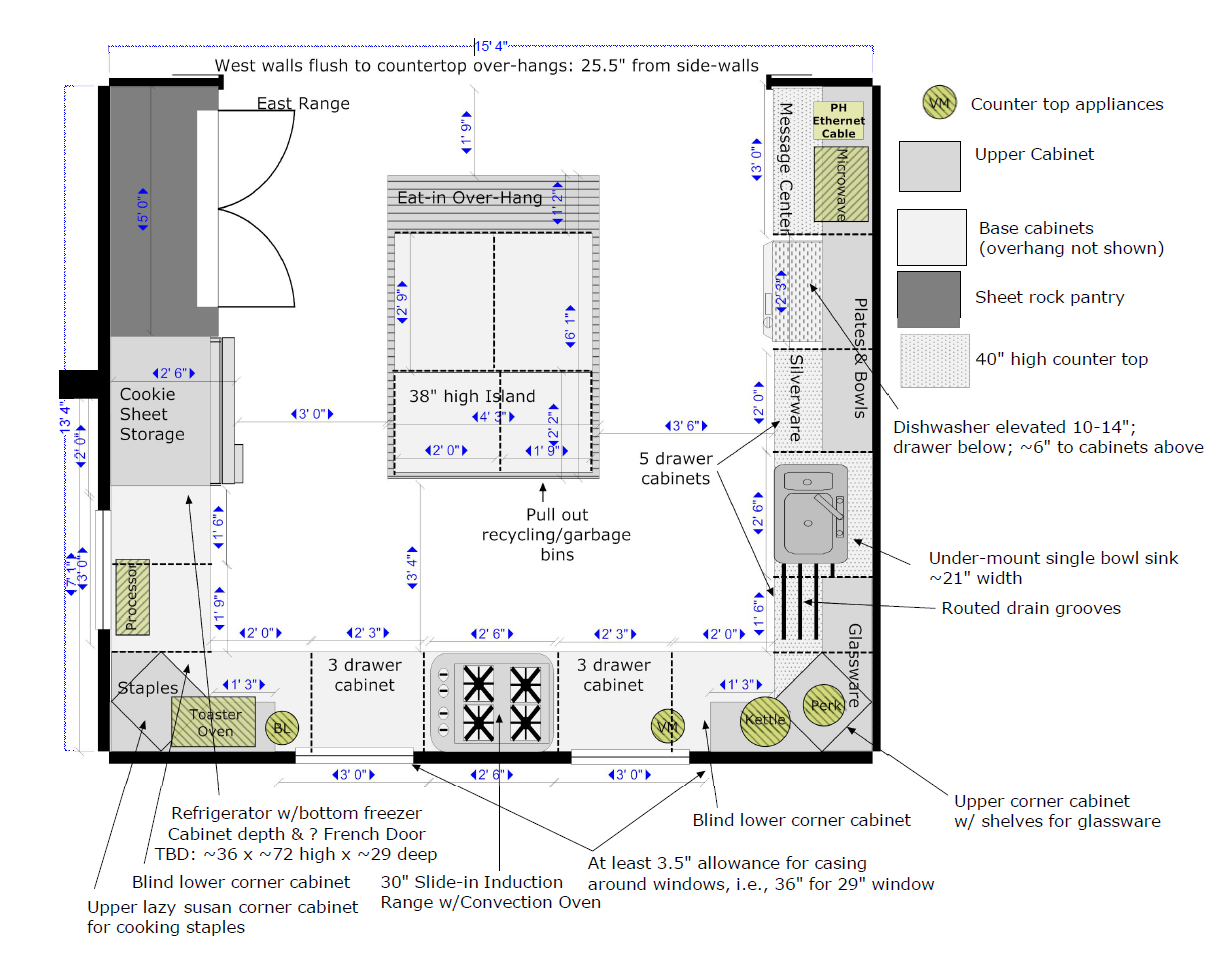
Most modern kitchen design focuses on the primary work triangle between cooktop, sink and refrigerator. That makes sense. You can waste a lot of motion wandering to and fro between these essential spaces. My Vāstu home posed some unique challenges to this configuration.
Vāstu Constraints on Design
As I’ve explained elsewhere, Vāstu design seeks to maximize support from Nature. Placement of the kitchen in the southeast achieves this goal. Positioning the cooking surface in the southeast of the kitchen further enhances the effect. In general, the brain functions better when oriented to the east or north when doing important activity. This means that the sink should be on the east or north wall. To further complicate matters, the source architectural plan included two windows on the east wall and one on the south. Fortunately, Vāstu doesn’t attach much weight to opening the refrigerator and therefore doesn’t constrain its placement, even if functional design considerations still do.
As a result, I had to develop and assess a lot of options to get to a final plan that I was happy with. I went through everything I could find at the library. Johnny Grey’s Kitchen Culture had the greatest influence on my thinking. He argues that a kitchen should be designed around functional ergonomics as well as aesthetics, but should not be limited by unexamined conventions like those for counter-top heights.
A Countertop Height for Every Function
Being tall and too prone to hunching over, I liked the idea of optimizing the heights of various work areas. I’d already seen the results from the two homes I renovated with Marlene. An intuitive design artist, she was somehow inspired to raise the height of the dishwashers to limit repetitive bending. I wanted to do that and also set the kitchen sink countertop at 40″.
Amy was a godsend in the design process. None of my ideas was too kooky for her consideration. She proved invaluable in pointing out the practical and aesthetic issues that would need to be addressed in achieving my goals. She also came up with some good solutions. Here’s where I was after a month of work with her.
It helped to get my ideas on paper. I used SmartDraw software. The exercise made it easier to get input from others. It also made the problems more visible. I included my initial thoughts about how I would work in the space and cabinet structure needed to support that.
This drawing helped me decide to eliminate the south window. Although I wanted the natural light, I knew it wasn’t going to be there at night. I gave higher priority to having an upper cabinet in that area. Henry provided the other key to solving the kitchen design problem: I could use my plan to define the precise locations for the windows.
I was then able to work with Amy to center the range between the windows and determine the cabinet sizes that would most functionally fill the remaining space. We figured out how to get the sink countertop to come out at 40″ and the island at 38″. I might have liked the range higher than the standard 36″, but it would have created problems with the windows so I let it be.
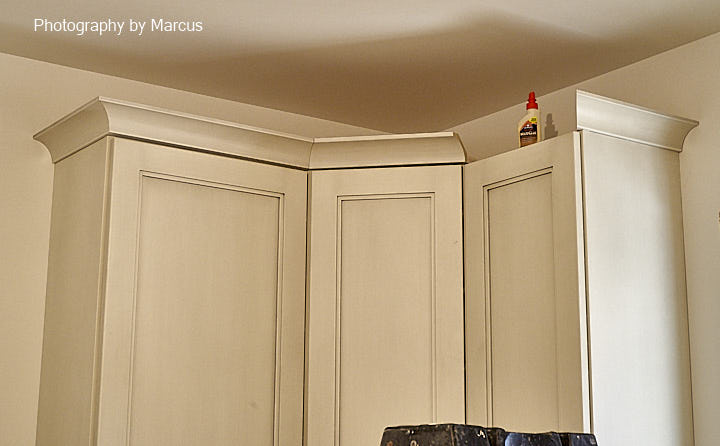
Cabinets for Every Budget and Taste
In that first year of planning, I started with a tight budget and frugal taste, but a discerning eye for quality. I was always of the mindset that you should get the best tool you can afford and that anything on sale is a waste of money unless you need it.
So, I was planning to get well-made cabinets, just not top of the line. Like most kitchen designers, Amy works with a range of manufacturers—all good. Her most expensive line runs double the cost of her standard line. Similarly, I wanted solid granite countertops mostly for their utility and durability. Any stone in some lighter tone would do. I had no need for exotic and expensive.

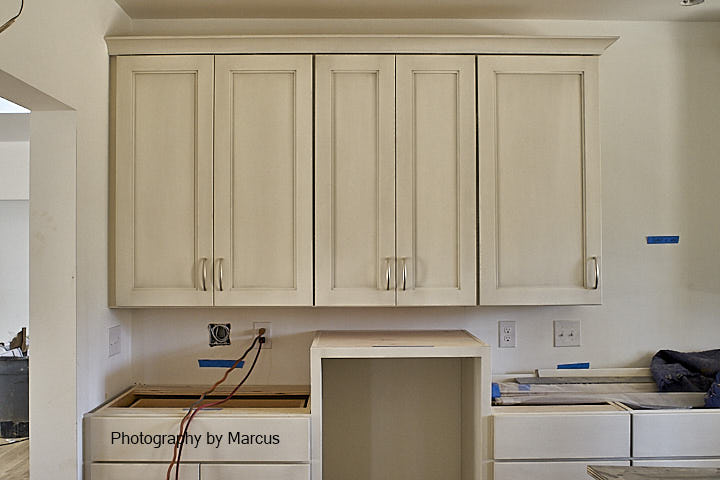
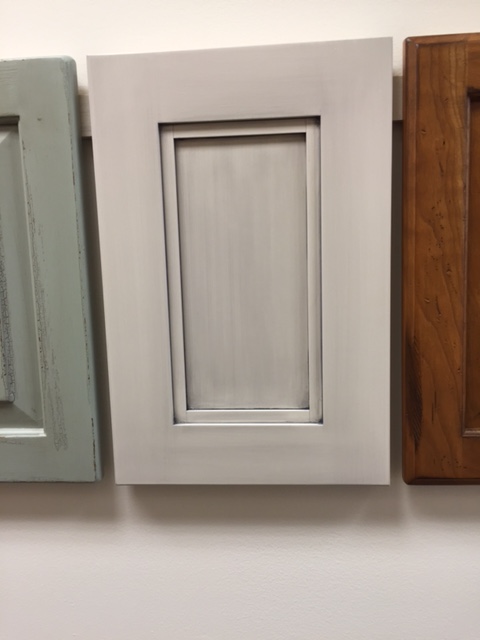
Thus, from the start I targeted this basic Shaker-style cabinet door. The trouble was every time I walked into Amy’s studio, my eye went to another Shaker-inspired door from Plain & Fancy, her high end manufacturer. The guy who thought he wanted simple, natural wood grain, etc. was attracted to subtle detail and a glazed finish.
Final Kitchen Design
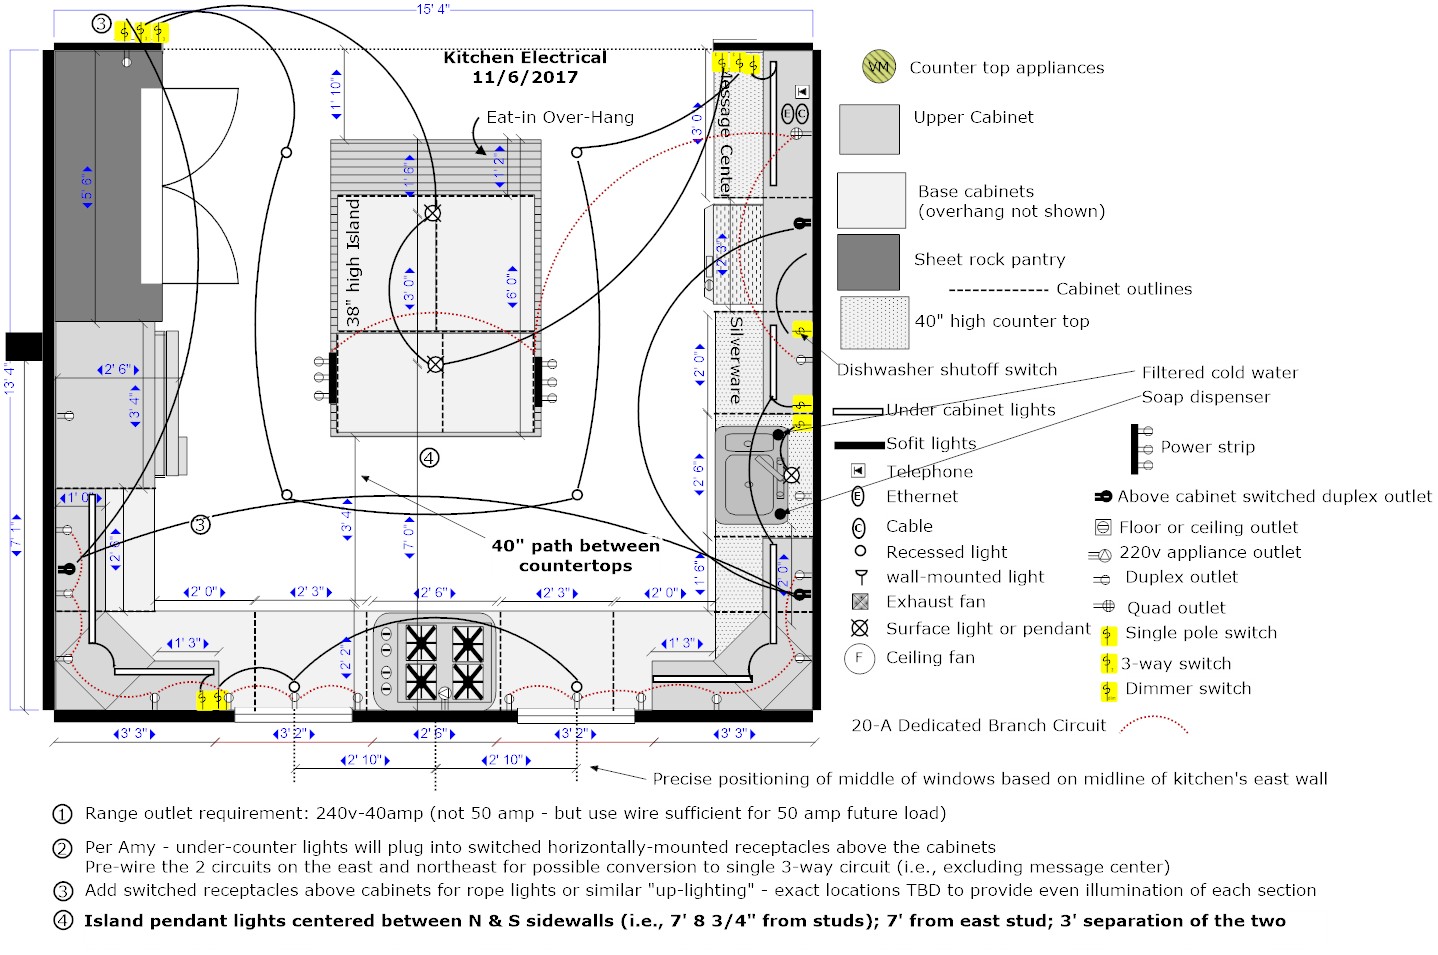
Last summer, after we started construction, I went back to Amy to revisit my earlier design decisions in preparation for finalizing the order. We tweaked the cabinet specifications for the kitchen, laundry and bath rooms, identified hardware and reviewed lighting.
At that point, I decided to differentiate the cabinetry among the rooms through choices in finish and door panel accent. In the process, I confessed my obsession with the Plain & Fancy door, but unwillingness to pay double to get it. Amy then came up with a third alternative: a similar Shaker-inspired door with a rabbeted edge from another manufacturer. Marlene helped me pick finishes.
When the door sample arrived, the decision was easier than I imagined. Even the cost-conscious Vernon applauded the choice.
Bathroom and Laundry Cabinets
I had an easier time with the cabinet design for these spaces, but the details still needed attention. For example, I sweated over whether I should do a single or double sink in the master bath. I also needed to deal with the lack of a linen cupboard.
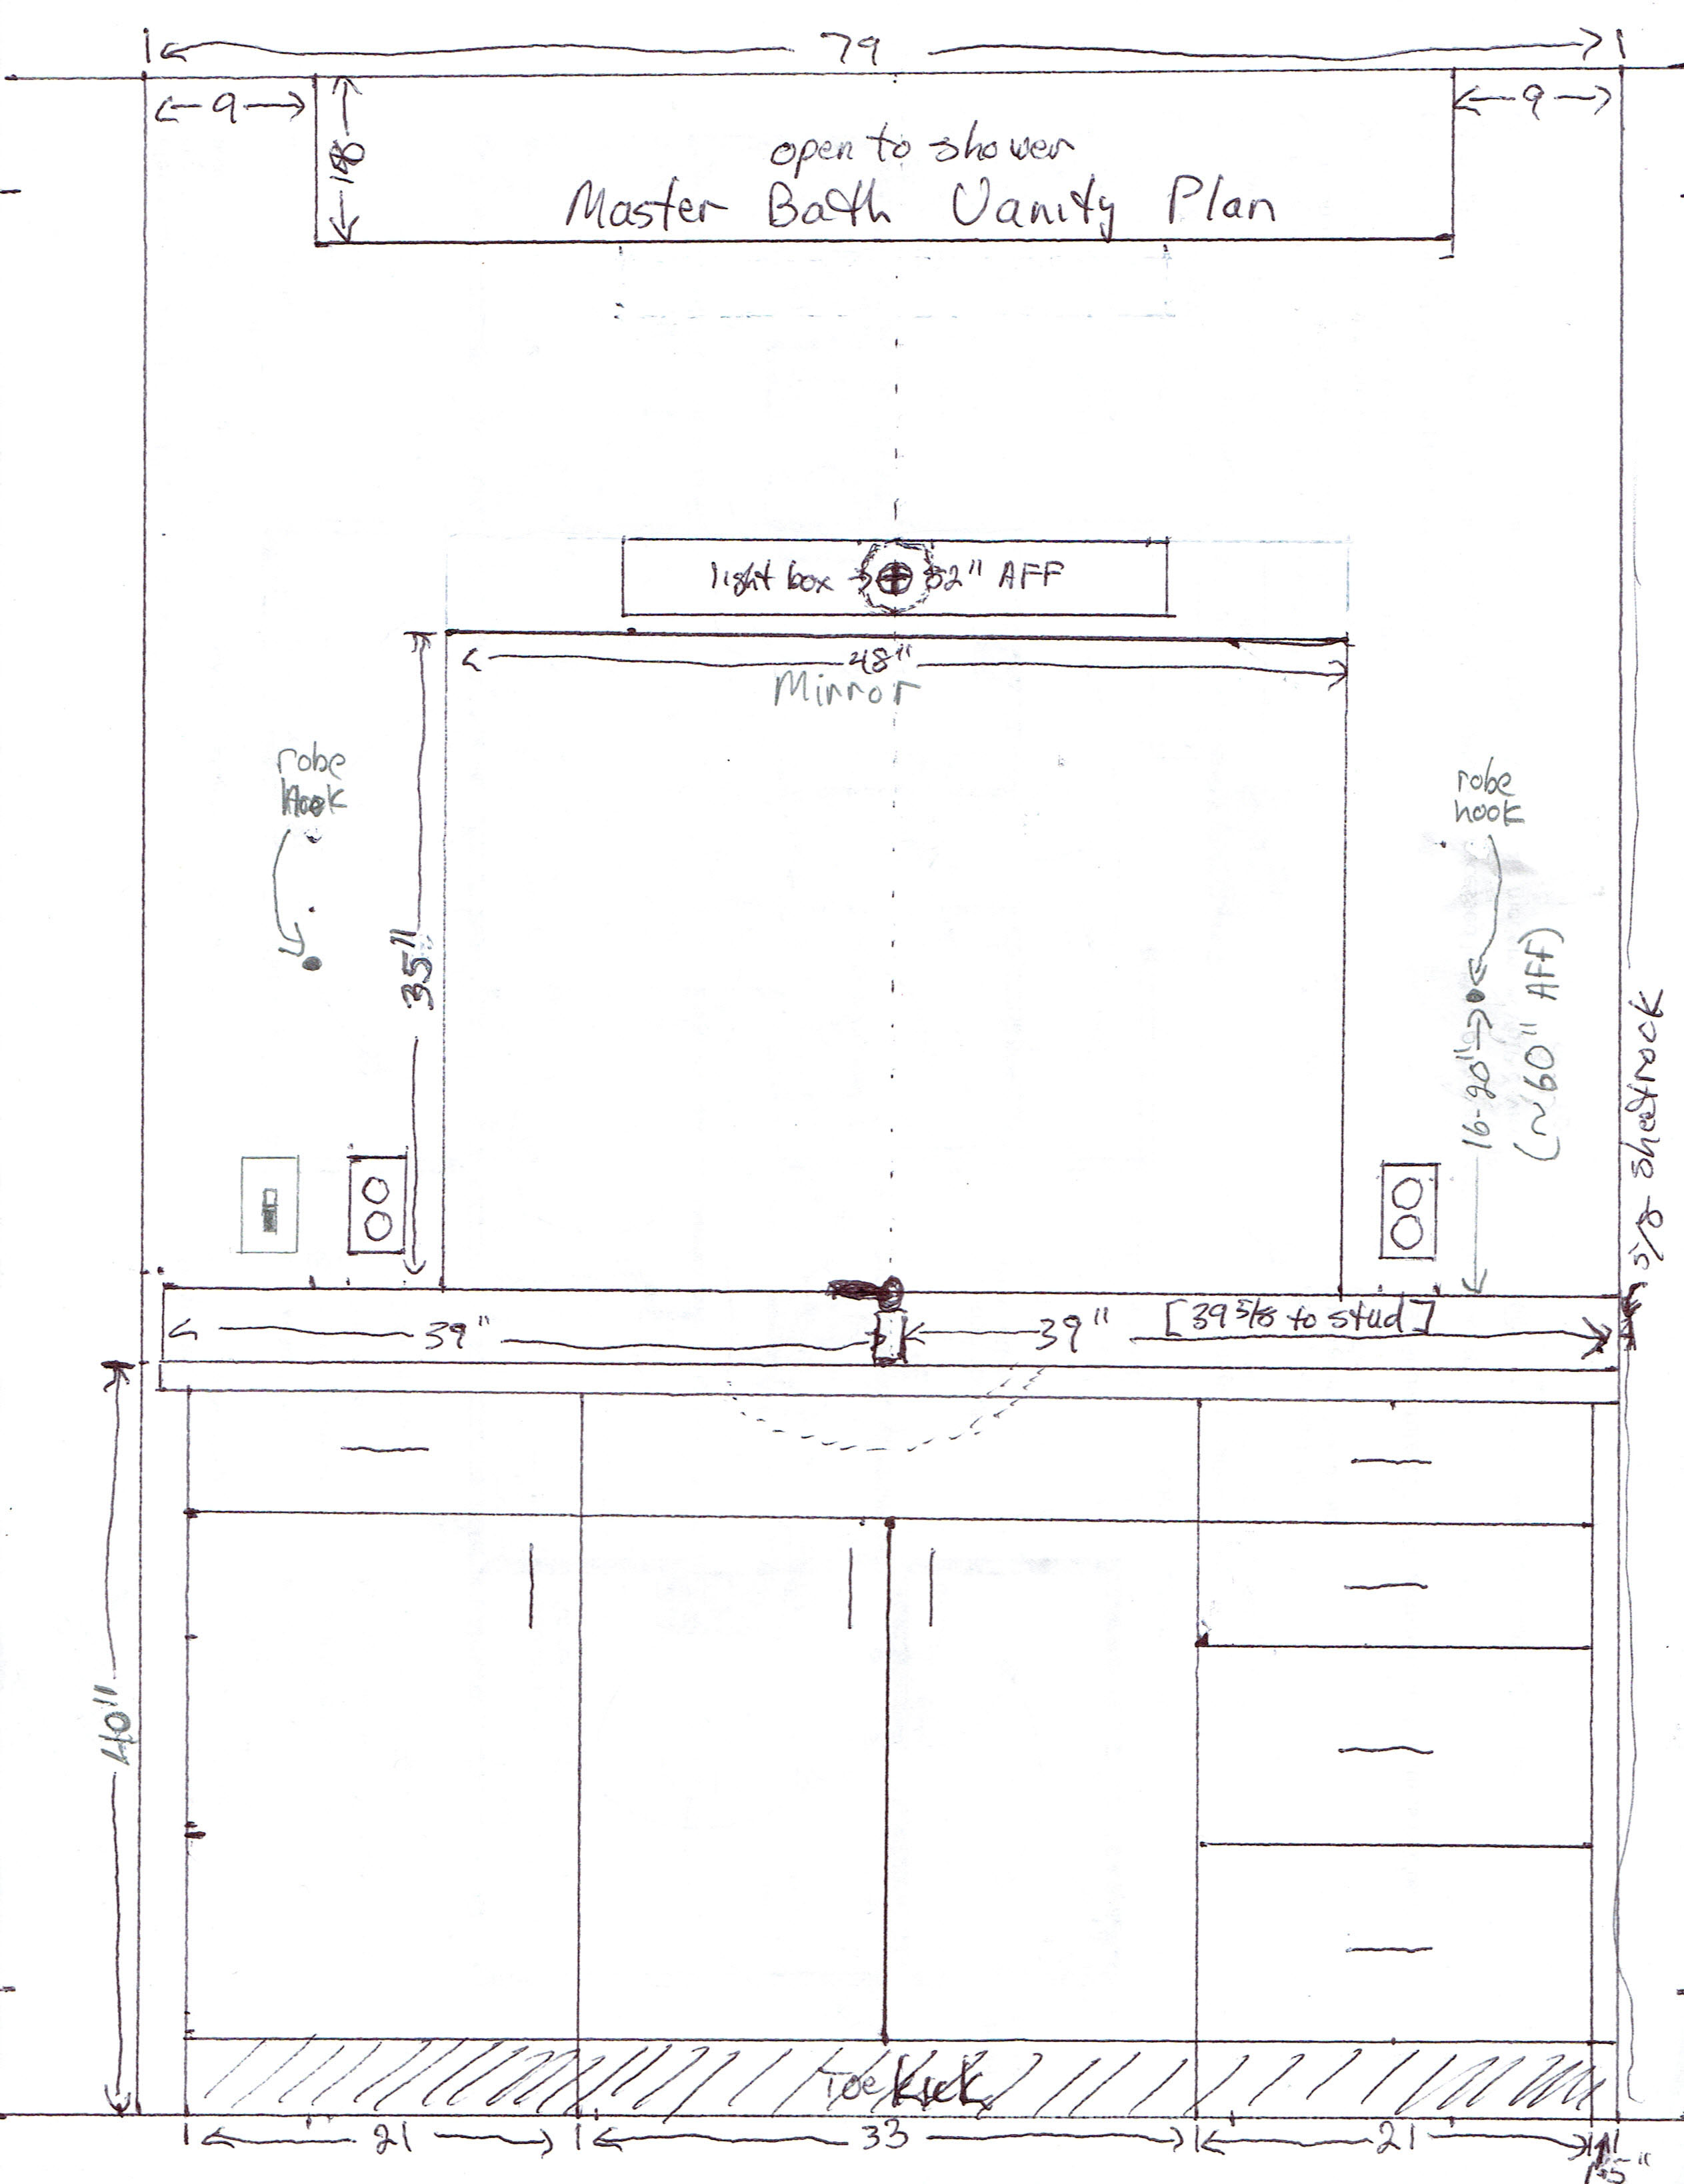
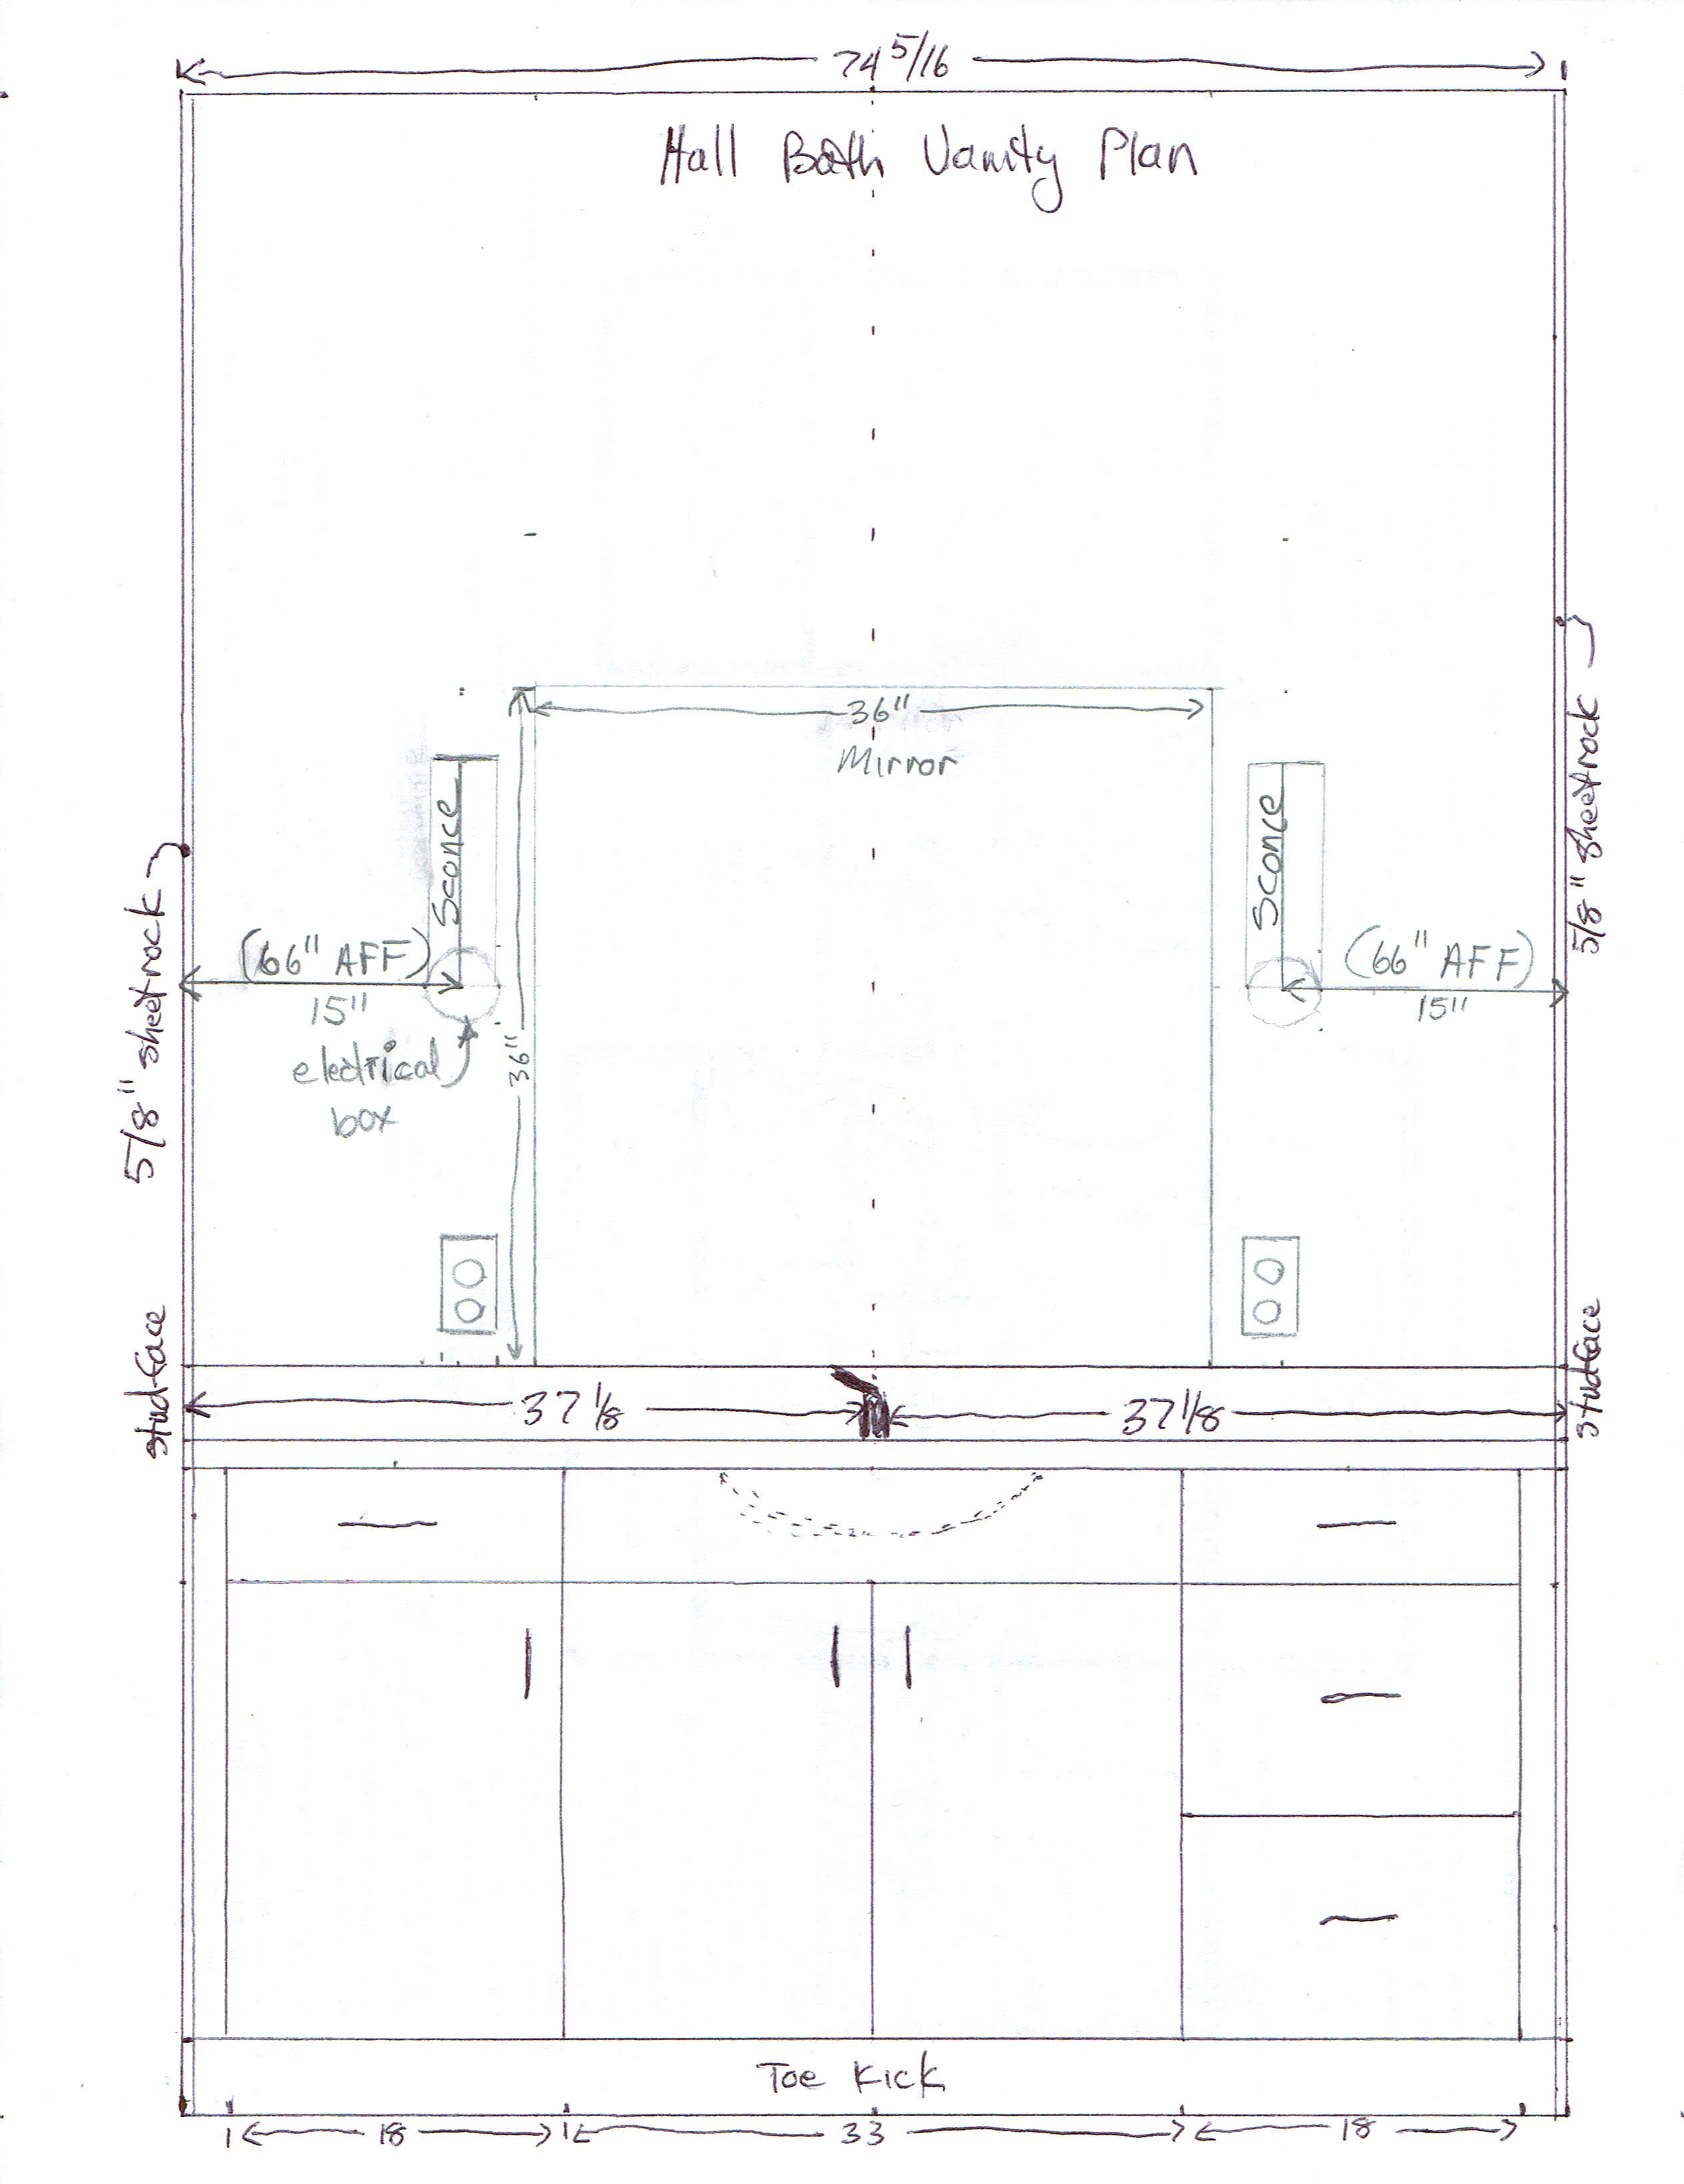
Bathroom Vanity Design
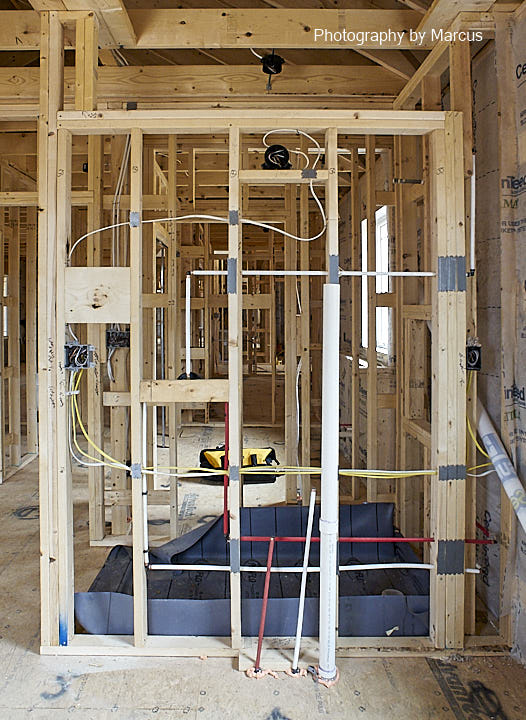
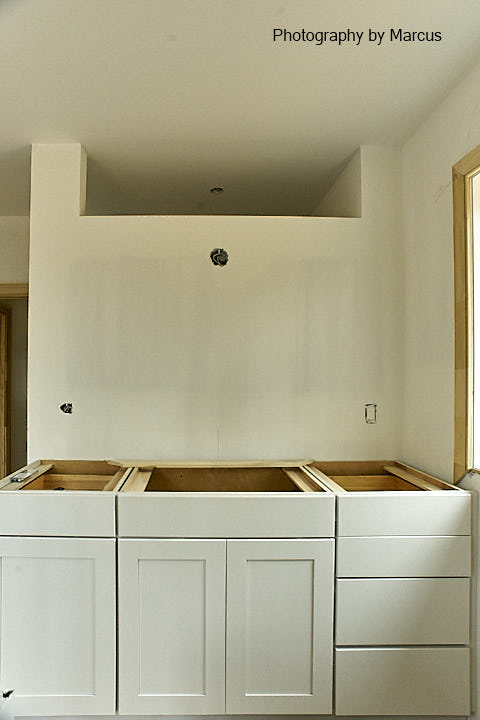
I found that had to address the plan for the bathroom vanities at the time of framing. Although I knew the length of the vanities from the construction drawings, I needed to pin down the location of electrical boxes and accessories like towel hooks that would need blocking.

In the laundry room, I couldn’t come up with a satisfactory layout that would pre-empt the need to bend over to access the washer and dryer. I finally decided to place them under the countertop in order to preserve enough workspace for folding clothes. We added a 6″ chase on the east wall below the countertop to protect the water and drain lines. That had the advantage of deepening the countertop at the sink where it would have been impractical to install a backsplash given the window sill height. We also had to plan for the washer/dryer depth requirements.
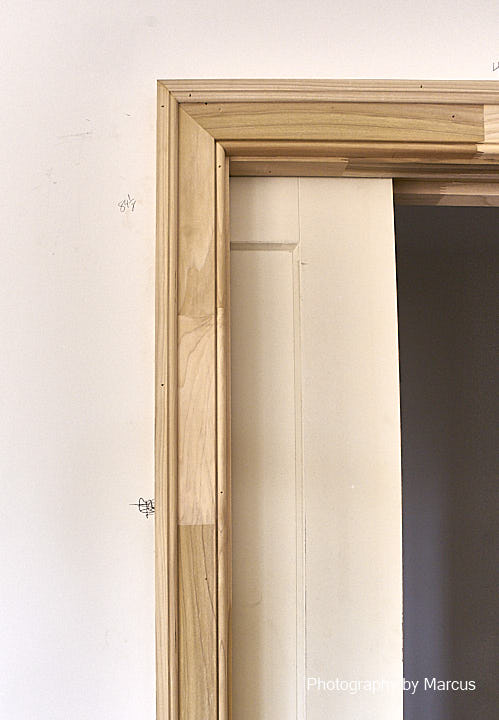
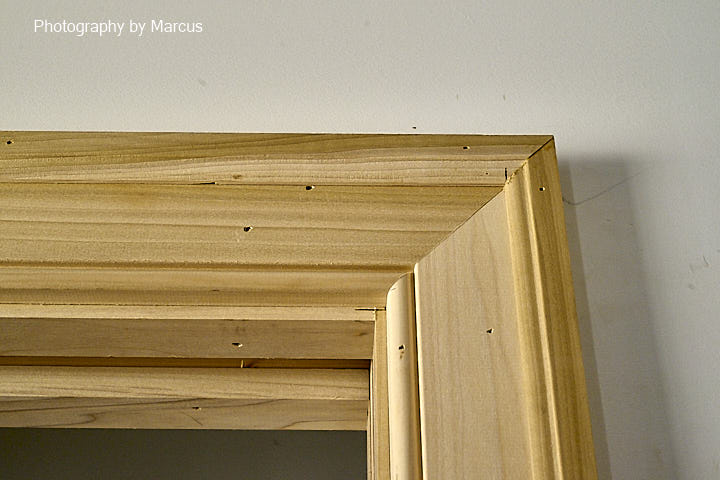
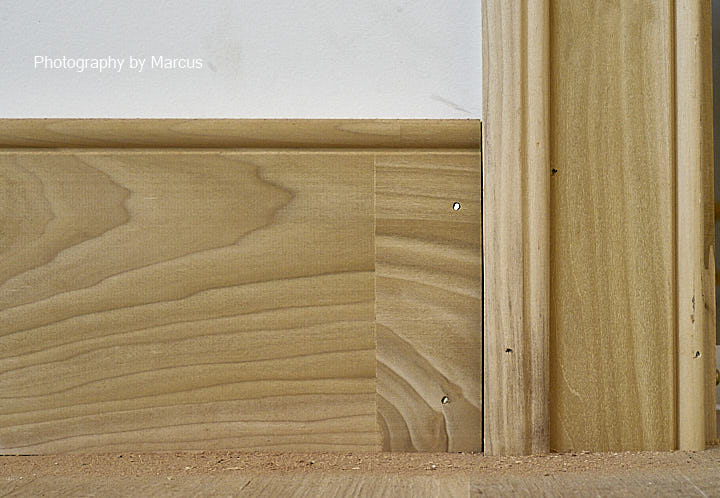
Window and Door Casings
After 28 years in New England, I was ready for a change in style from 6-panel doors and the colonial look. I chose 2-panel doors. Vernon had me look through a kit of sample moldings from his supplier. Together, we settled on a simple 5.5″ beaded baseboard. It came in a 3.5″ version suitable for window and door casings, but I thought it was too blah and needed a little more depth to the profile. So we added a small piece of trim to the outer edge.
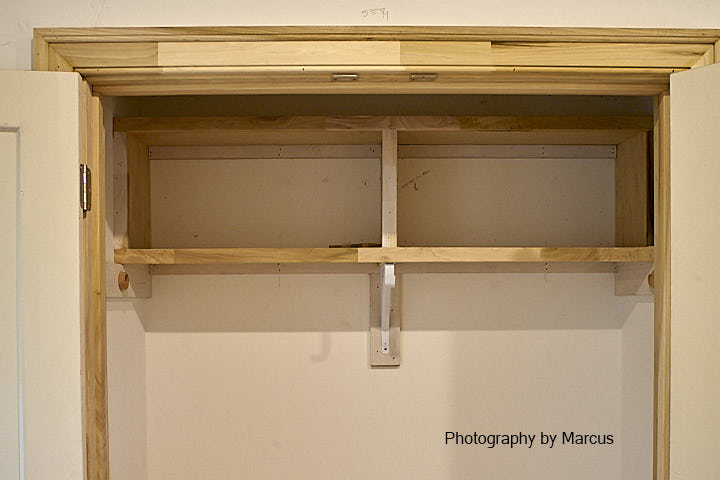
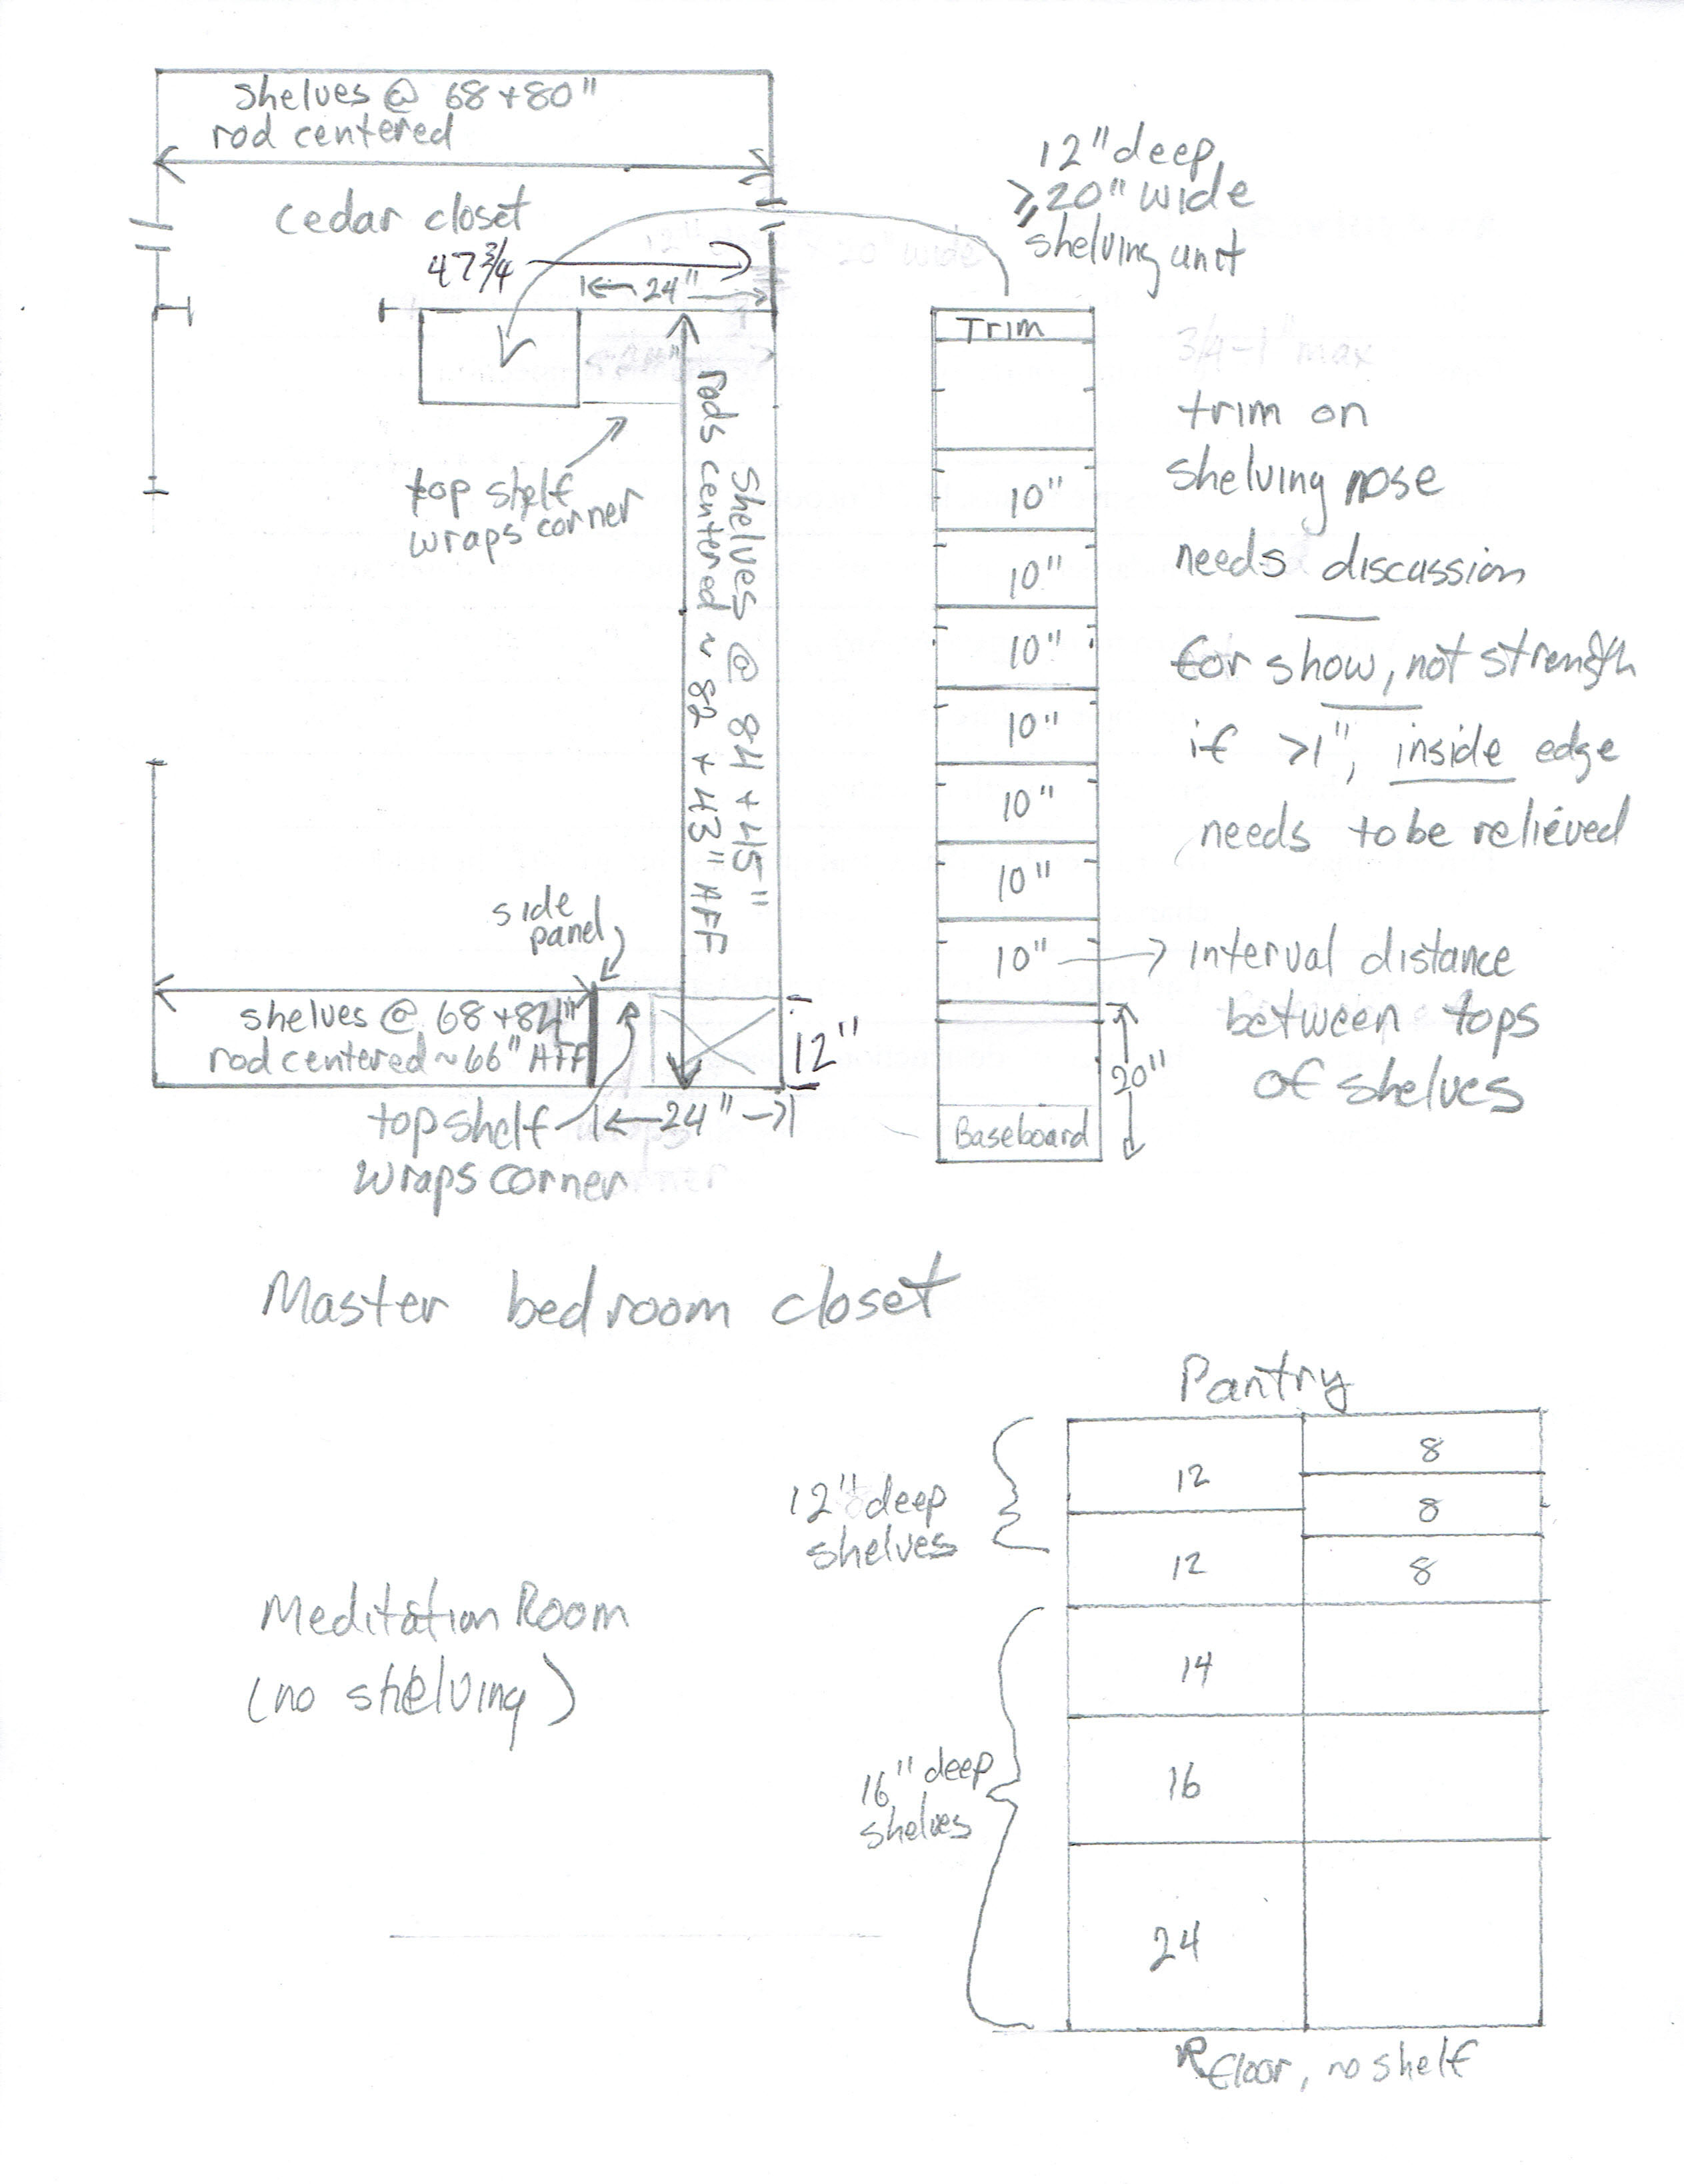
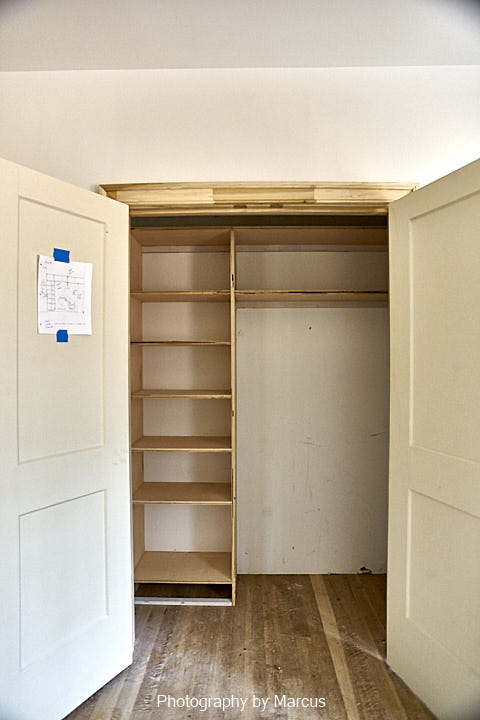
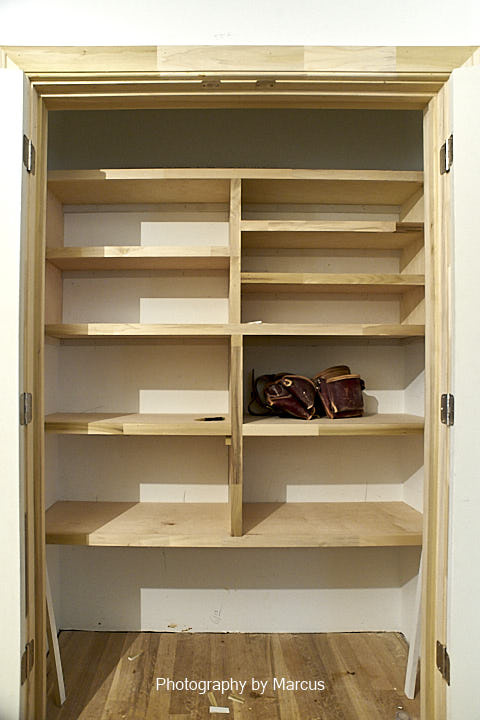
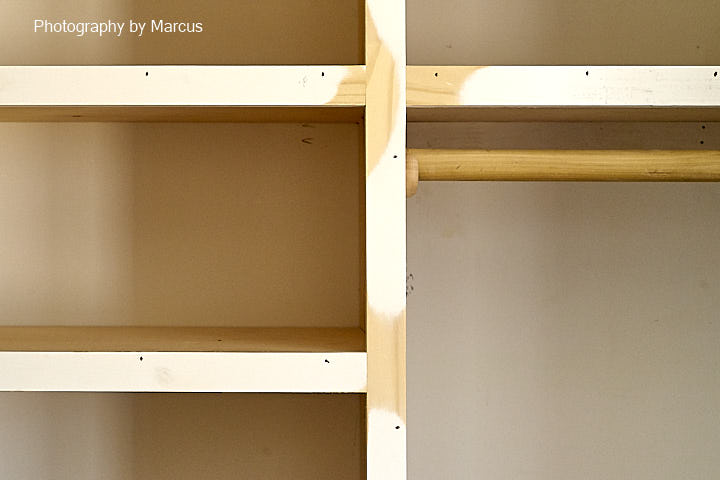
Closet Shelving
Marlene put a lot of thought into the layout of her closet shelving and encouraged me to do the same. I copied a few of the things she did that I found particularly useful: adding a second shelf above the one typically placed above the clothes rod; and spacing shelves close together in strategic locations like the pantry and bedroom closets so items don’t have to be stacked. I also considered the size of the file folder crates I plan to store in my office closet.
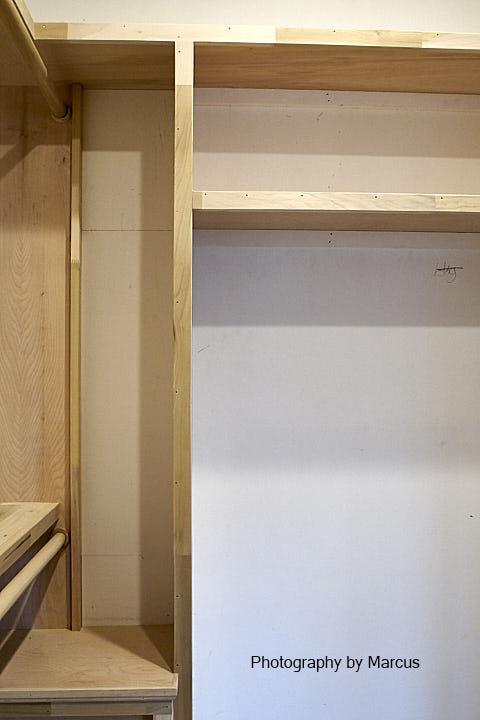
The “mudroom” was a bit of a challenge. Basically it was bonus space included in the floorplan. Marlene had the brilliant idea to enlarge the space to include the adjacent hallway. That made it large enough to use as a project room or guest office. Initially, I thought I’d leave the closet a blank slate and use a portable clothes rack until the need became clearer. Once I started working on the design for the other closets, I realized that I could simply devote half to a coat rack and the other half to general storage shelving.

Everyone Loves Vernon
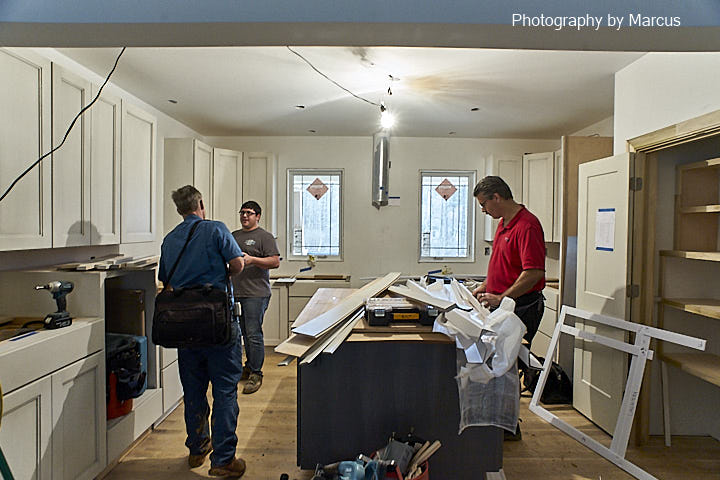
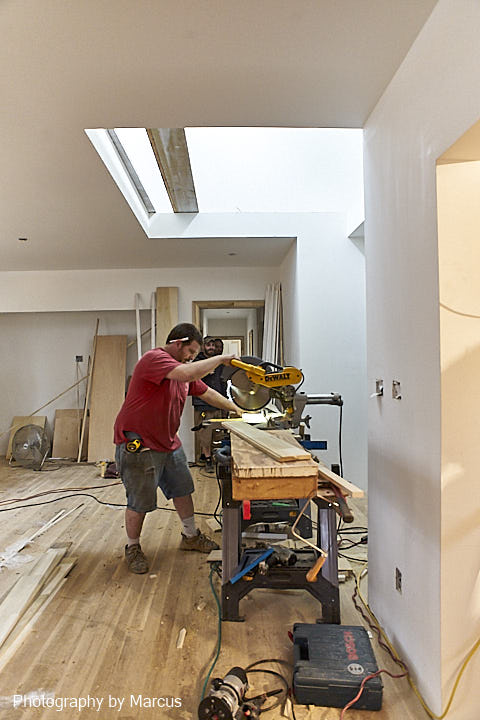
When I arrived the morning of February 22 to review the countertop templates with the Vose representative and Vernon, there were at least seven others busy at work including the kitchen cabinet installer, four trim carpenters, and two HVAC installers working outside on the workshop mini-split compressor hook up. The living/dining area was filled with three miter-saw workstations and long boards.
Two of the men independently stopped to tell me how much they loved the home and especially working on the project with Vernon. He treats them well, clearly specifies the work, orders and organizes all the necessary materials, and involves them in decisions that require their expertise. I was glad to have that vibe infuse the quality of their work.
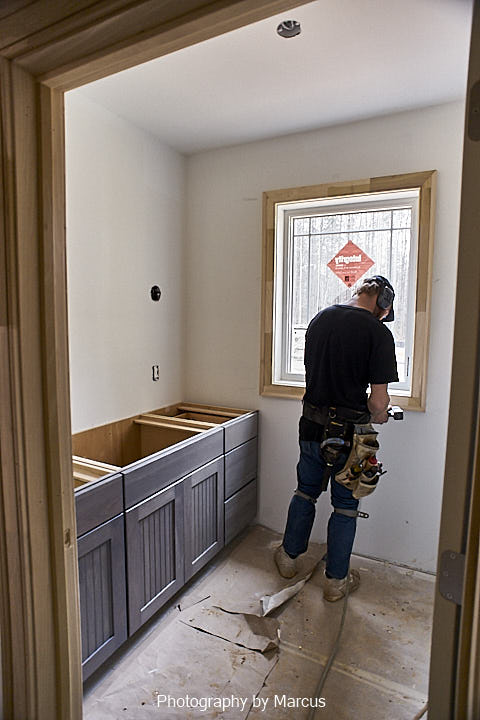
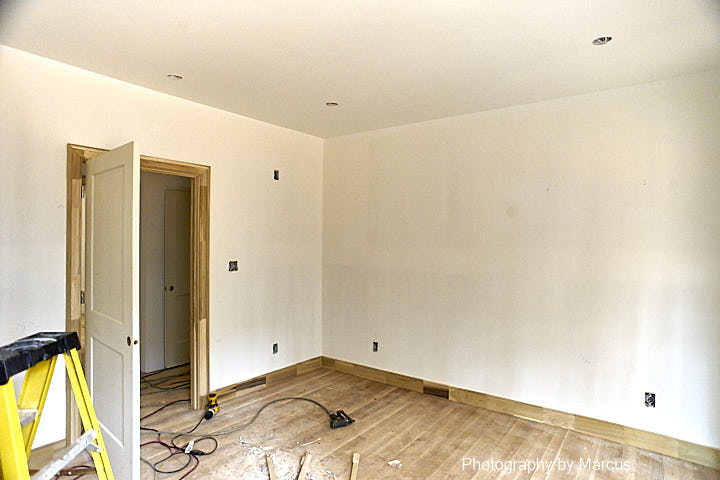
Photographs from March 2, 2018


Photographs from March 9, 2018