In building according to Vāstu, I wanted to use non-toxic, environmentally-responsible interior finish materials. That proved to be the easy part. Achieving my functional and aesthetic design objectives was more complicated.
My Love-Hate Relationship with Tile
I love tile, but it’s expensive and hard underfoot. We did tile in the kitchen in our last home. It was beautiful and withstood many years of dog-licking, drips and other messes. Unfortunately, it didn’t like having things dropped on it. It might have been better if we saved extra tiles to replace those that cracked under pressure.
I’ve also had kitchens with wood floors and liked them. In the process of designing my kitchen, I came across Kitchen Culture by Johnny Grey. It’s a thought-provoking book. He argues that a kitchen should be designed around functional ergonomics as well as aesthetics, but should not be limited by unexamined conventions like those for counter-top heights.
He advocates for rubber floors based on practical considerations about fitness for use. I once toured a home that featured a kitchen with industrial-quality rubber flooring. It was very comfortable underfoot. On the other hand, it looked industrial. I was also concerned about the maintenance requirements. I can handle mopping, but didn’t want to get into waxing & buffing.
Having started down that path, I explored other alternatives to tile and wood for the kitchen, mudroom, darkroom and laundry room. Natural linoleum (e.g. Marmoleum)attracted me, despite lesser durability than wood and tile. It’s water-resistant, soft under-foot and easy to maintain even in high traffic areas. So I was sad to discover that it is very expensive in sheet form. At $15/sqft installed, you’d have to really like it to choose it over other options. Although it is also available in squares, my builder was concerned that approach might be a poor solution.
Cork is another renewable product that is both beautiful and delightful underfoot. Unfortunately, it’s not as durable as other products. I’ve used rubber fatigue mats to protect my prior darkroom floors. I figured I could always do that in the kitchen if necessary. Thus, for me, it was hard to escape the choice of hardwood everywhere but the bathrooms.
My Bathroom Tile Adventure
After I committed to doing tile for the bathrooms, the next step was to choose the material and design the layout. Since all the design elements of the home are interconnected, it turned out to be more complicated than I had anticipated. Originally, I believed my choice for countertops should drive decisions about color palate for cabinets, tile and wall paint. While that may be valid in principal, I wasn’t able to follow that exact sequence.
From my happy experiences in kitchens with solid granite countertops, there was never a doubt that I would go with stone here. Initially, I wasn’t much concerned with the specific stone other than wanting it to be relatively light colored. If you’ve ever gone granite shopping, you know there is a huge range in price. The lowest price stones tend to be quite uniform in appearance. The more expensive options have more character, but also may vary more widely from slab to slab.
Finding the Right Granite
My builder uses Vose for countertop fabrication. They in turn prefer to source material from Cosmos in Raleigh. On my first trip to Cosmos with Vernon way back in 2015 before ground-breaking, we only found two options that seemed to fit with my concept: Santa Cecelia Light, a common uniform and affordable stone; and White Fantasy, the next level up. I discovered that each “level” or grade of stone encompasses a broad range. It turned out that White Fantasy was double the cost. What is more, they only had 3 slabs left. At that point, the cabinet design was just starting and we had little idea how much stone we would ultimately need. Even if I had been convinced that it was worth the price, I wasn’t prepared to reserve a couple of slabs that I might not use.
That turned out to be a good decision. When I returned to Cosmos last fall with my good friend Marlene, we found half a dozen stones that I liked. When I got the pricing back from Vose, I was delighted to learn that they were only marginally more expensive than Santa Cecelia Light. The additional cost for granite backsplashes also proved small. Although I toyed with doing tile backsplashes, I preferred the simplicity of granite. The cost advantage made the decision easy.
The only open issue was the space between the range and the hood. I soon found I could get a sheet of stainless steel fabricated at reasonable cost. While I later revisited that decision, at this point I was comfortable committing to cabinet finishes before choosing a specific granite.
Finding the Tile
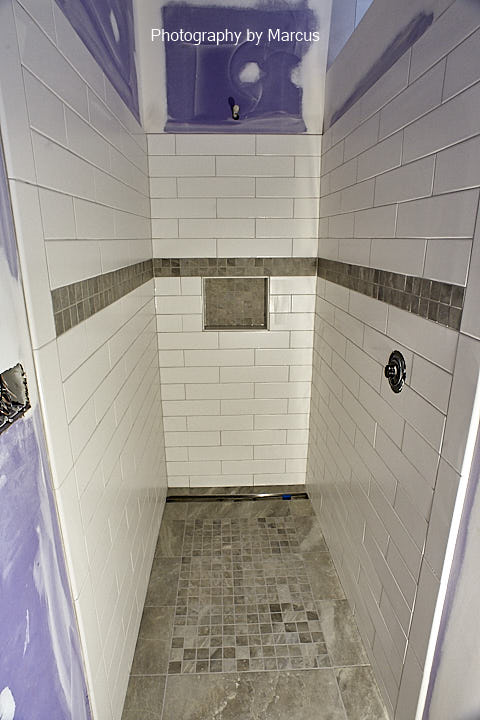
I had also made some preliminary bathroom tile decisions back in 2015 and wanted to explore a wider set of options. Even though I had samples of my cabinetry in hand and a couple of the possible stones, I didn’t have a sample of the top choice for the bathrooms—only a photo. Well, actually Vernon passed me a sample from Vose, but I thought there was some mistake because it bore little resemblance to the slab we saw at Cosmos. So with some trepidation, I visited three tile shops. The design consultants who met with me did a terrific job working with such a lame proxy. To my delight, they concurred that, since I had a linear drain design, I could use large floor tiles in the shower.
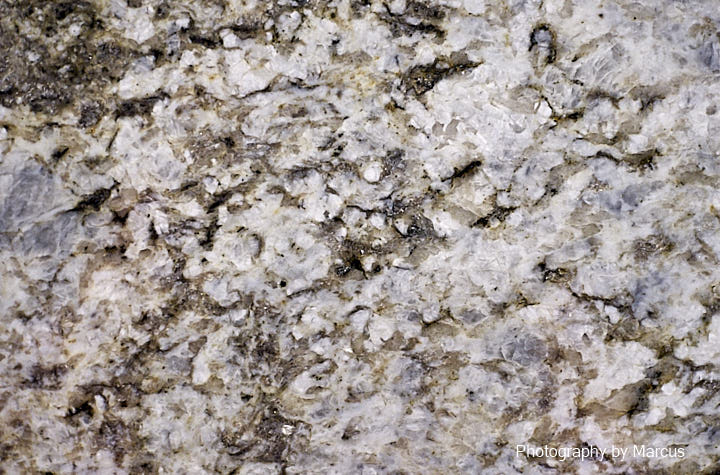
Armed with a trunk-load of tile samples, I went back to Cosmos. I soon discovered that there had been a run on Blue Dunes in the few months between visits. Two other parties anchored on the one remaining slab while I was taking photos. You can see from the images that it was substantially different than the one that had first beckoned. In fact, I didn’t so much like it compared to the others I was considering. It’s easy to forget that stone is a product of nature and subject to great variation even across a single quarry.

On the plus side, I found that much of the tile I’d carted around the warehouse floor worked well with all the stones on my short list. So I changed the plan and decided to choose the tile and deal with the granite later. Vernon suggested that we go with Vose to pick specific slabs after the cabinets are installed and they’ve made the templates.
Tile Design
Then I went back to Traditions in Tile at Brier Creek which provided the floor tiles I liked best. I had an idea for the Master Bath shower and felt they could probably come up with the appropriate tile. I dragged Marlene along as a sounding board. She’s got a designer’s eye and can see at a glance what might take me hours to figure out on my own—especially in relation to color.
She was worried that the shower floor tile might not provide enough traction at some later point in time when age compromises balance and agility. (Isn’t that what friends are for?) She suggested using a limited amount of the mosaic form of the floor tile I selected as a safety and aesthetic design element and to echo it in wall accents. I thought it was a great idea.
At that point, it would have been nice to have had input from the tile installer. Since Vernon and I weren’t scheduled to meet with him until the day of the dry layout, I went to work sketching out the details of our design concept so we’d at least order the right amount of material.
The catch was that the back wall of the shower measured 36″ and the wall tiles came 4″ x 16″. Thinking a symmetrical brick tiling would look best, I came up with this design. Marlene suggested using the 2″ mosaic in the corners to fill the gap across the back wall. As I later discovered, an experienced tile installer would just shift the pattern by 4″ and skip the extra mosaic.
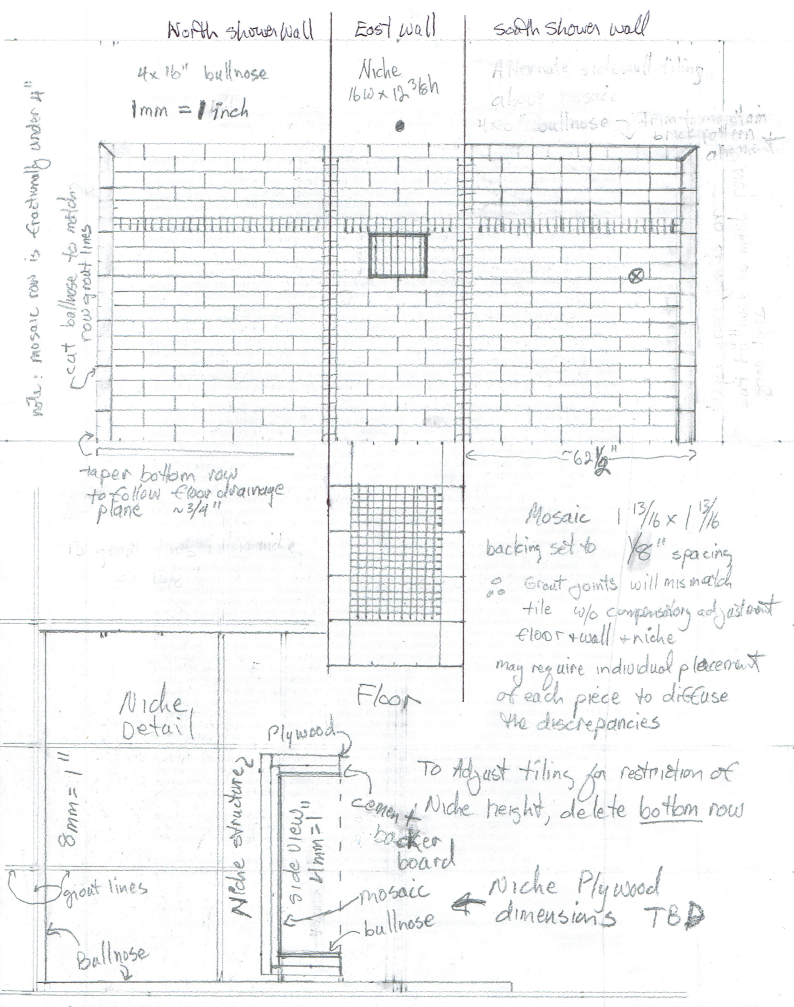
At least the exercise helped me to anticipate the issues that needed to be resolved at installation. In particular, I wanted the bullnose edging to align across the top and sides with the brick pattern. Since the bullnose also came sized 4″ x 16″, it was possible to achieve this with a consideration of the grout line thickness and a willingness to sacrifice a few extra pieces cut to 12.25″ to span the rows at the entrance.
Niche for Toiletries
Fundamentally, ergonomic concerns drove the design for my shower. Vāstu principles constrained only the placement of the shower head to an east or north wall. We took care of that in the initial construction drawings. At 60″, the shower was deep enough to eliminate the need for a door. I worked with Vernon on the placement of the shower valve proximal to both the entrance and the shower head.
For toiletries, I wanted a niche built-in between the east wall studs instead of a corner shelf. Vernon was enthusiastic and accomodated my request. When I first saw the framing, I was concerned that the opening wasn’t high enough to place the shelf above my elbow height (44″). I should have had him make an adjustment then.
My design sketching exercise confirmed my suspicion that it would have to go a little lower. Still, I figured we might be able to get it to fit by cutting out the lowest bottom plate and re-inserting it above its companion, but by the time we met with the installer, they already had the cement backer boards in place and the game was over.
With the niche placed a little lower, I would have liked the horizontal mosaic accent to have been positioned about two rows higher. I considered voicing this concern during our meeting, but got side-tracked after an hour of working through all the other factors we needed to discuss and resolve. When I remembered later, I still could have called Vernon in time to intervene, but hesitated to throw out anything that might complicate what was already in motion. I’m still happy with the way it turned out—especially the bullnose border.
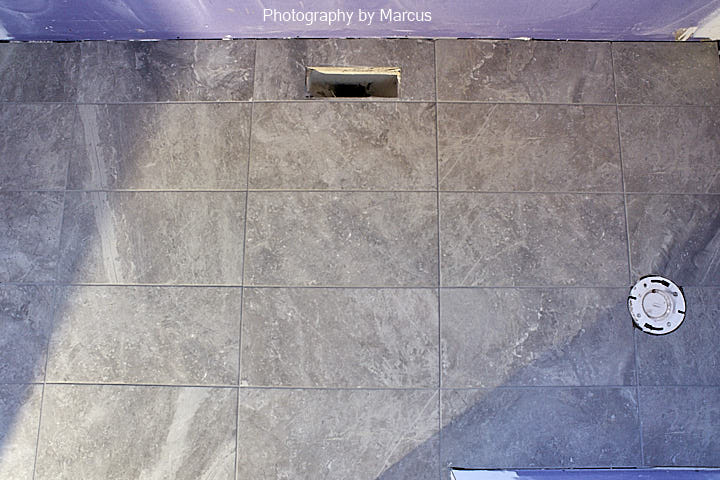
Floor Tiling Details
Also I found that the mosaic squares were only 1 13/16″ on a side. Allowing for 1/8″ grout joints, this meant that a 12″ square would be something less than the width of a solid floor tile. The installers adjusted for this with strategically placed cuts to the floor tiles boarding the mosaic floor insert area. They indicated they could have done this whether I desired a brick or stacked pattern. Even though most of their clients are doing a brick pattern, I elected to stay with the stacked pattern. To me it felt more restful. It was enough to have the brick pattern on the shower walls.
Hardwood Floors
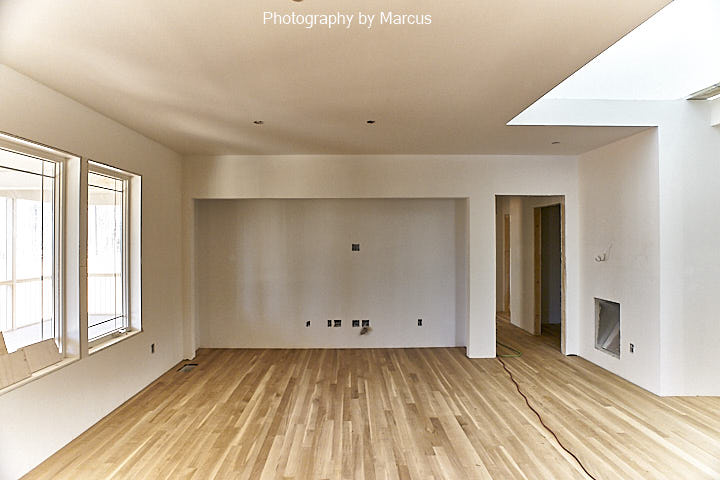
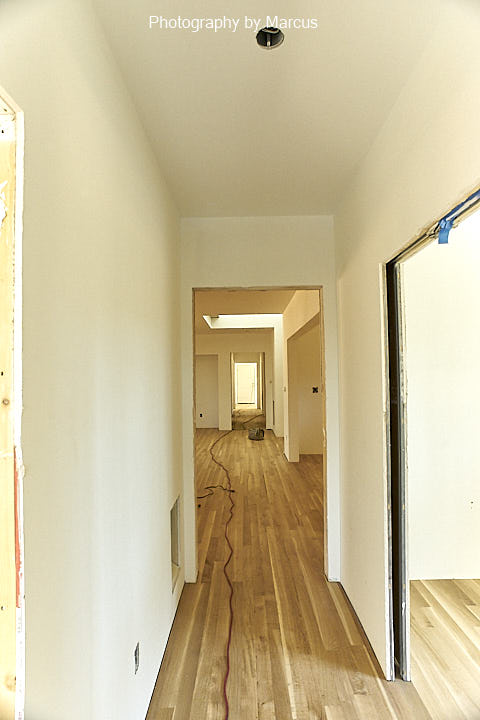
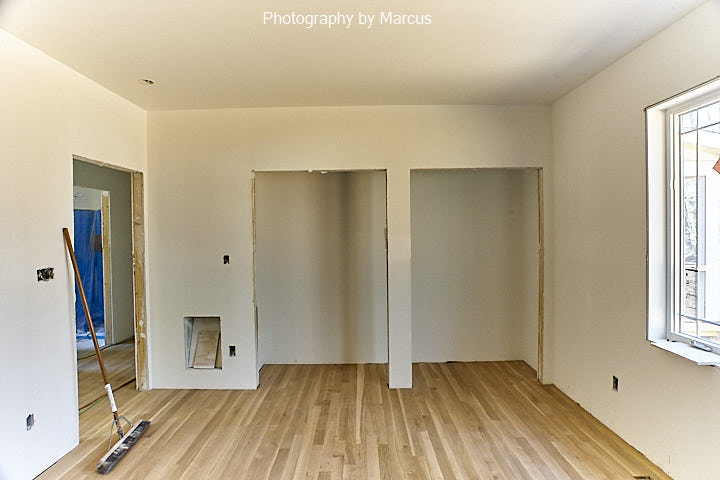
Compared to tile design, selection and installation, I faced less drama with the rest of the flooring. Early on I’d determined that natural white oak flooring would be the simplest, most beautiful and most cost-effective approach to achieve what I wanted.
When construction delays threatened due to the lack of HVAC (the geothermal well drillers have yet to deliver on their promises), we had to revisit the wood flooring decision. We were worried about problems with gaps or cupping from uncontrolled humidity. Vernon advised that engineered flooring would completely eliminate these concerns, but at increased expense and decreased durability. Engineered flooring consists of a layer of hardwood veneer over plywood. The veneer is so thin, it can only be sanded and refinished once.
Rift-Sawn Wood to the Rescue
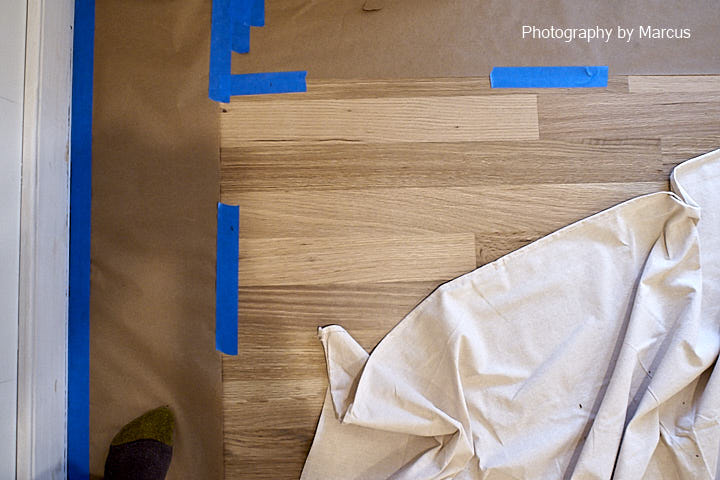
I suggested we investigate rift-sawn white oak with the installer. Because the boards are cut perpendicular to the growth rings, rift-sawn flooring best maintains dimensional stability. The installer was enthusiastic, but wanted to carefully source the material from a northern mill that uses slower kiln-drying methods. Since that was what I really wanted, I was enthusiastic and happy to pay the modest additional cost (about 10%).
The flooring installers completed their work February 15-17, after the painters had a few days to prime the interior walls and paint ceilings.

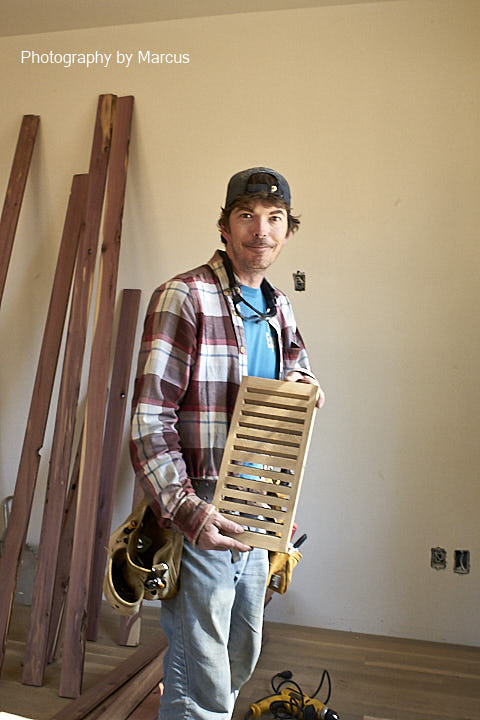
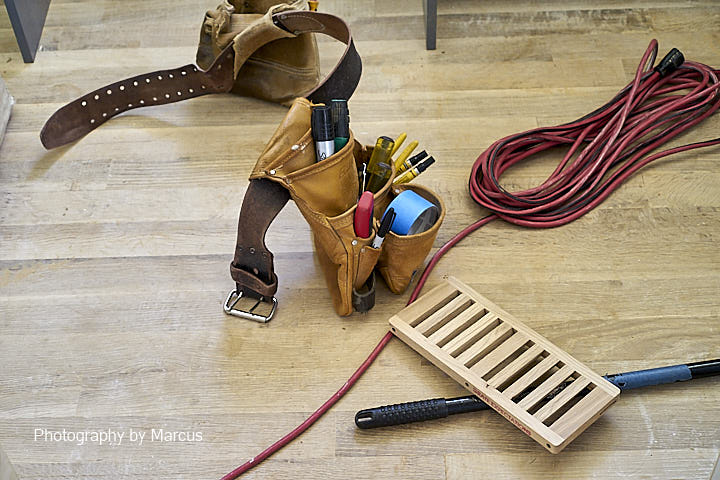
Grate Expectations
On Friday March 2, 2018, I was happily surprised to meet Jamie in the process of installing custom floor registers made from my oak flooring. It’s just another unexpected touch that reflects Vernon’s attention to the fit and finish of the home.
Floor Finish
I was keen to assure the contractor used a non-toxic finish on the oak flooring. After researching the flooring contractor’s preferred product, Bona Traffic HD satin, I was fully satisfied. It’s low VOC, water-based product that’s Greenguard certified for use in schools. Bona is a family-owned, Swedish company founded in 1919. Their Waterborne Classic Sealer has the same credentials.
Since we’ll be using Earthpaint Rainforest Sealer on the exterior decking, I also explored using their products on the interior floors. I backed off, however, when Vernon reminded me that the installers do best with standard materials and process. Even if Earthpaint was acceptable to them, their lack of experience with it would have introduced unnecessary risk.
When I was out at the house on March 27, the painters had already covered 99% of the floor in preparation for their work. Here’s a sneak preview of the finished product. Actually, the floors will get a third coat of Bona Traffic after the major appliances roll in.